Open firmware for the 3.5" NerdQAxe++ clones, with optional Ethernet
The NerdQAxe++ is a small open-source Bitcoin (SHA-256) miner. On AliExpress you’ll find clones with a bigger 3.5" (480×320) screen, from sellers such as YYSlupping. The hardware is nice. The firmware is the problem.
The problem: closed firmware on an open-source miner
These clones ship with pre-installed firmware whose source code isn’t published. A miner has your pool login, your payout address and all your hashrate, and with closed firmware there’s no way to check what it does with them.
The open NerdQAxe+ firmware that the rest of the community runs, shufps/ESP-Miner-NerdQAxePlus, doesn’t support the 480×320 panel. Its maintainer has said it won’t. So until now, owners of these clones had to choose between closed firmware and a blank screen.
The fix: a clean build from open source
nerdqaxe-bigscreen is built from the open shufps firmware and follows its develop branch, so you know exactly what’s running on your miner. It adds two things:
- 480×320 display support. The big-screen code is ported from brunneis/nerdqaxeplus2-3.5-inches. Since the main firmware won’t take it, it’s maintained in this fork.
- Optional W5500 Ethernet. Wired networking if you want it. Without the Ethernet board, the miner runs on Wi‑Fi like stock.
Everything else from the main firmware works unchanged, including InfluxDB/Grafana monitoring.
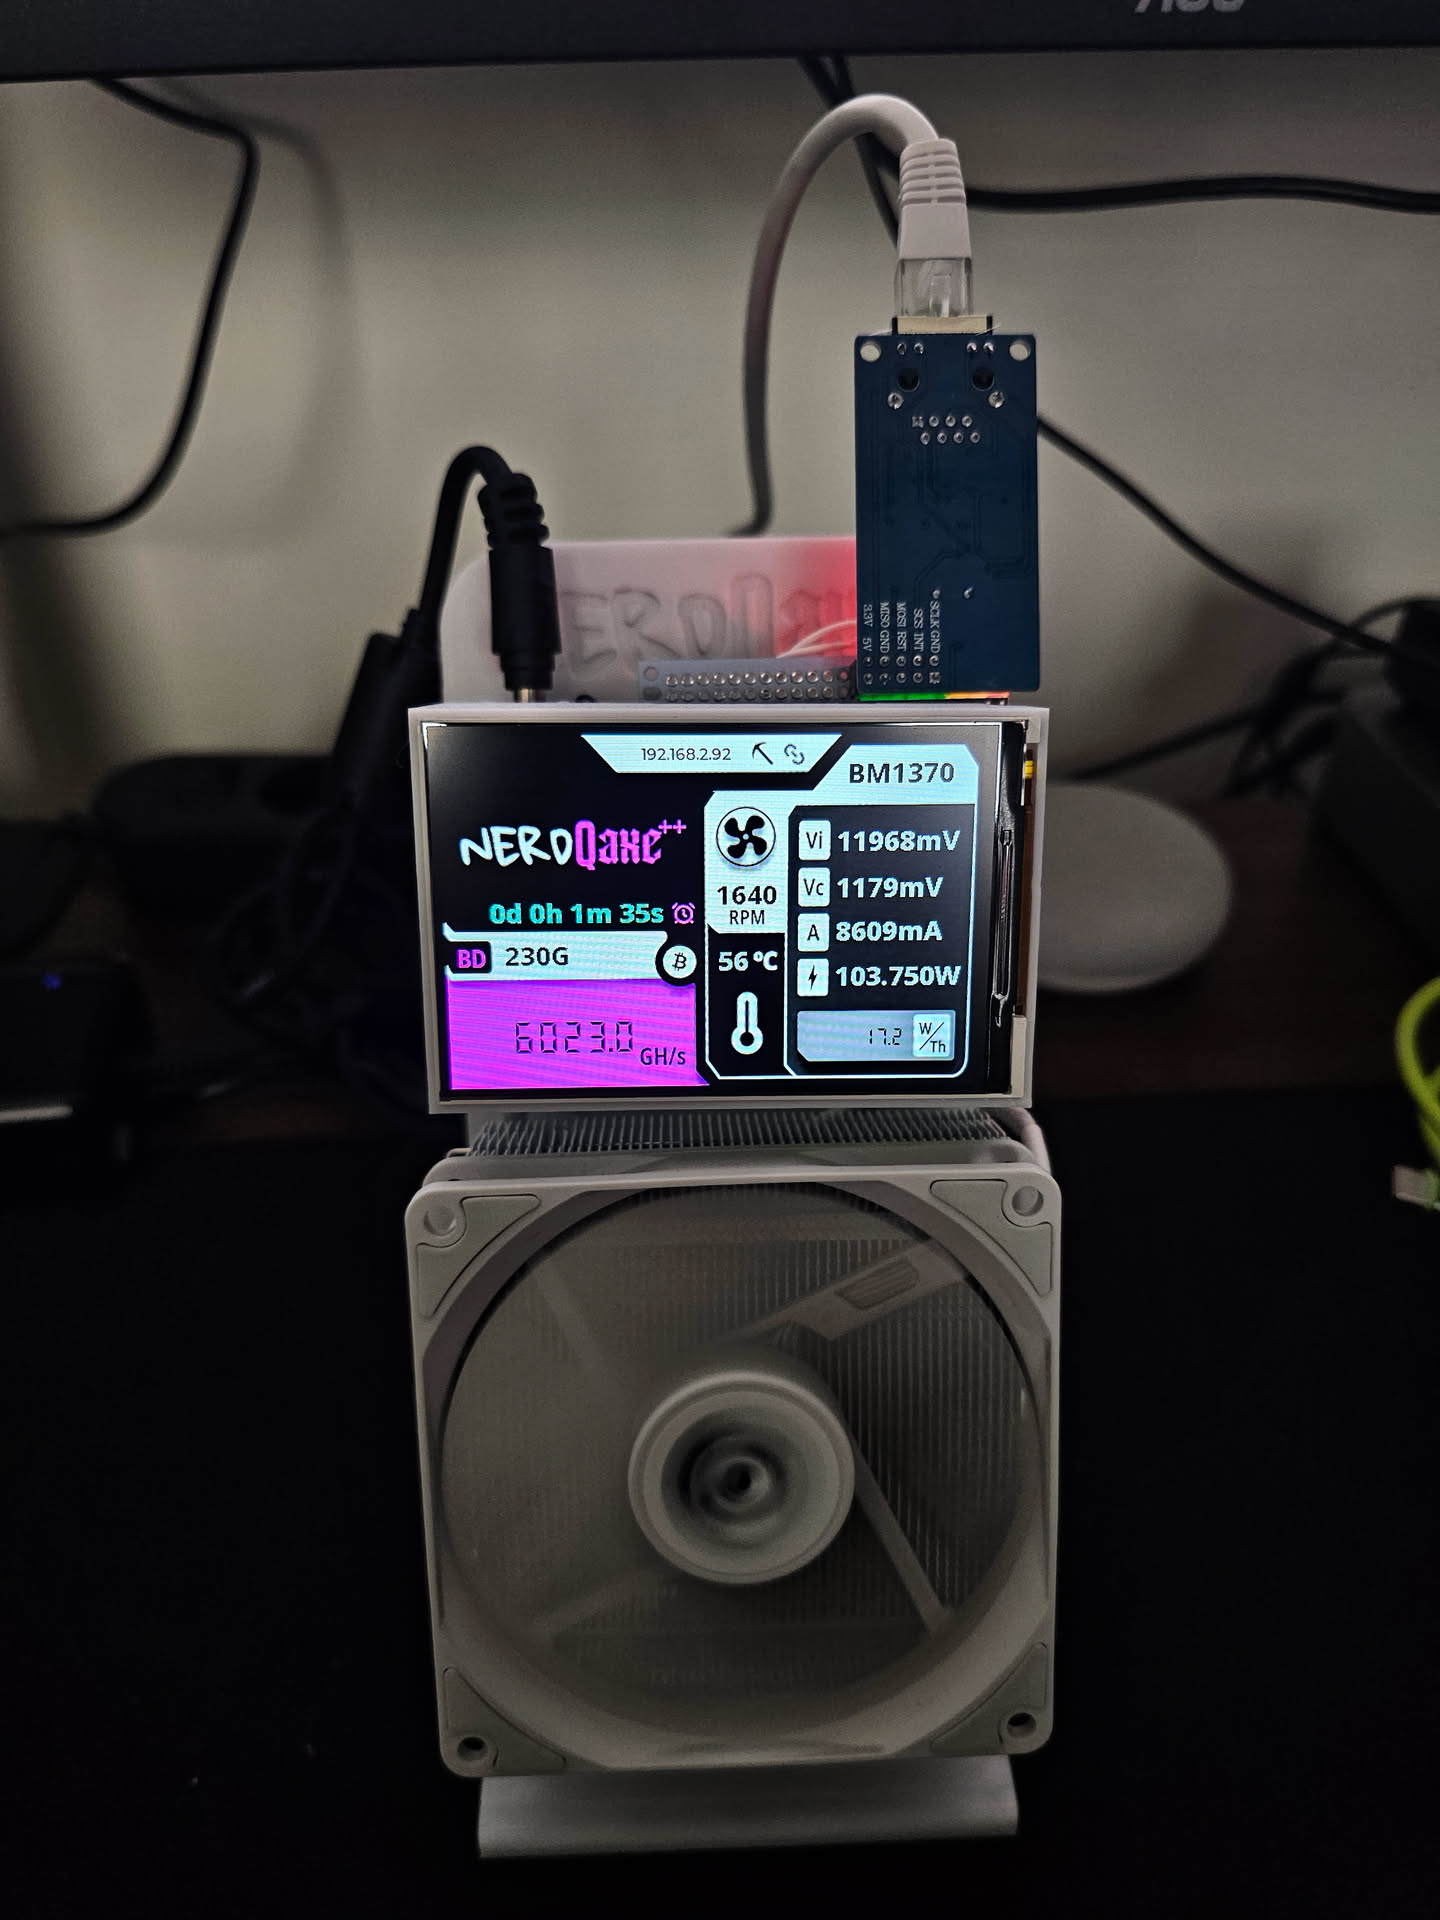
The 3.5-inch NerdQAxe++ clone running this firmware, with the W5500 Ethernet shield attached.
Making the UI fill the bigger screen
The display code was originally laid out for the NerdQAxe’s 320×170 screen. I scaled it to fill the 480×320 panel and checked it on a real device. The mining screen, fonts, network and status icons, and the block-found overlay all display correctly.
Ethernet, using code that was already there
I didn’t write a new network stack. The main firmware already has Ethernet support built in (Board::hasEthernet() and its NetworkManager), originally for the Q1370/Q1373 boards, and I switched it on for this board. The wiring follows the common community pinout from CryptoIceMLH’s LAN fork. It’s tested on real hardware: a NerdQAxePlus2 with a W5500 board runs over Ethernet.
It needs only four signal wires, plus power and ground:
| Signal | GPIO |
|---|---|
| MOSI | 12 |
| MISO | 16 |
| SCLK | 2 |
| CS | 21 |
I built it as a small add-on board on a 20×14 perfboard. The NerdQAxe++ plugs into a 12-pin pass-through header, and the W5500 sits on 5-pin headers on the other side:
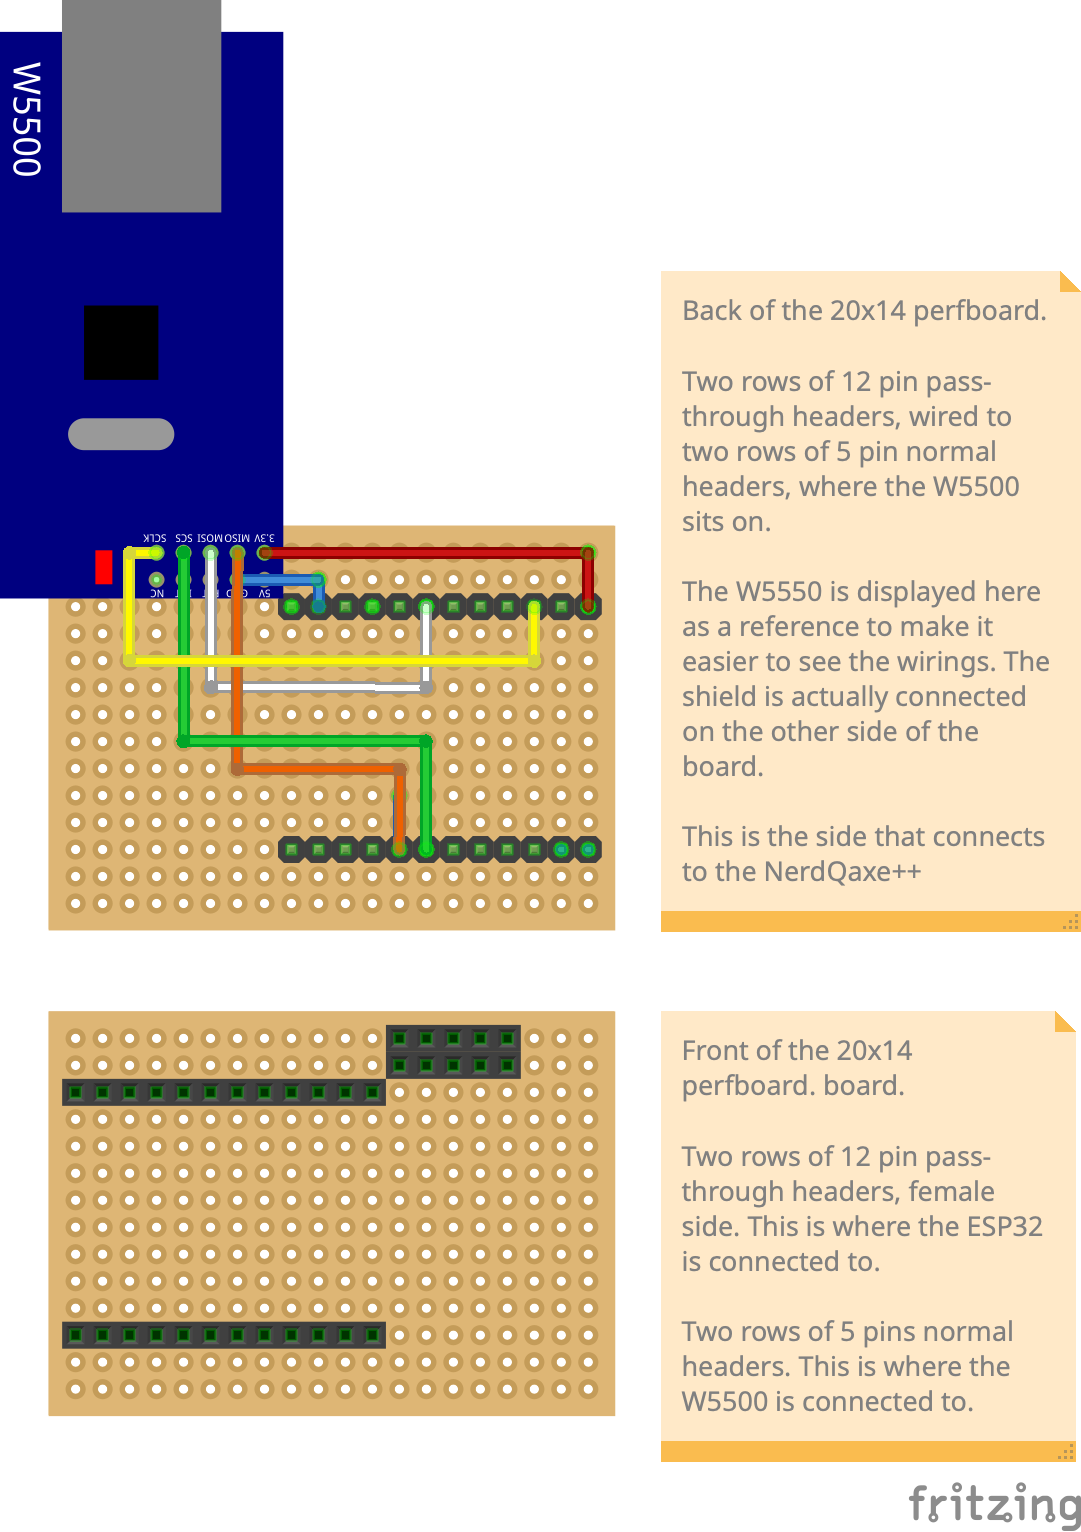
In the diagram, the W5500 is drawn on top so you can follow the wires. In reality it mounts on the opposite side of the board. I drew the diagram in Fritzing, which I had to build from source on macOS first.
Why the interrupt pin isn’t used
By default the W5500’s interrupt (INT) and reset (RST) pins aren’t connected. The driver checks the module regularly (polling), and these modules reset themselves when they power on.
I did test interrupt mode: with INT wired to GPIO11 and the firmware built with W5500_USE_INT=1, it works and boots cleanly. But on a hand-wired add-on board, the interrupt wire picks up enough electrical noise that it performed worse than polling, with more delay and jitter. Either way it makes no difference to mining, so the default build polls.
Building
The repo uses a Docker toolchain, so you don’t need ESP-IDF or Node installed. It’s pinned to ESP-IDF 5.3.3, because newer 5.3.x versions currently run out of fast internal memory (IRAM) on the 480×320 build.
# first time only
cd docker && ./build_docker.sh && cd ..
git submodule update --init --recursive

# build
export BOARD="NERDQAXEPLUS2"
export BIGSCREEN=1          # turns on the 480x320 display code
./docker/idf.sh set-target esp32s3
./docker/idf.sh build
That gives you build/esp-miner.bin (the firmware) and build/www.bin (the web UI).
Flashing
This build isn’t on shufps’s Webflasher or releases page. Those don’t include 480×320 support, so flash the files you built yourself.
The first flash must be over USB. The bigger screen’s graphics need more space, so the flash layout (partition table) is different from stock: the app partitions are bigger and the web UI partition is smaller. An over-the-air update can’t change the layout. Put the miner in bootloader mode with the boot button if needed, then do a full flash:
./docker/idf-shell.sh
idf.py -p /dev/ttyACM0 flash
Or build a single combined image and flash it with bitaxetool. First copy config.cvs.example to config.cvs and fill in your pool and Wi‑Fi details:
./merge_bin.sh nerdqaxe+.bin
./docker/bitaxetool.sh --config config.cvs --firmware esp-miner-factory-nerdqaxe+.bin -p /dev/ttyACM0
After that, you can update from the web UI (Settings → firmware upload) with build/esp-miner.bin and build/www.bin. Your pool and overclock settings are kept.
Credits
This fork stands on a lot of other people’s open-source work:
- @shufps, for the open NerdQAxe+ firmware this fork follows: ESP-Miner-NerdQAxePlus.
- @skot, Ben (@benjamin-wilson) and Johnny (@johnny9), the Bitaxe developers at bitaxe.org, for ESP-Miner, the firmware everything here descends from.
- @BitMaker, for NerdAxe.
- @brunneis, for the original 480×320 display port: nerdqaxeplus2-3.5-inches.
- @CryptoIceMLH, whose ESP-Miner-NerdQAxePlusLAN documented the community W5500 pinout.
If you have one of these clones, try it, and open an issue if something doesn’t work.